Instructions: How to Move Your Bluesky Account with EU-HAUL
EU-HAUL helps you move your Bluesky/ATProto account from one server to another. Think of it like moving to a new apartment -- all your posts, photos, followers, and settings come with you. Your identity stays the same; only where your data lives changes.
Before You Start
Make sure you have:
Your Bluesky handle (e.g. yourname.bsky.social )
Your Bluesky password (the one you log in with -- not an App Password)
Access to your email - the one linked to your Bluesky account (you'll receive verification codes from Bluesky)
The address of the server you're moving to - for Eurosky this is eurosky.social
Good to know: Moving your account does not change your username, your followers, or who you follow. Everything transfers automatically.
Step-by-Step Guide
Step 1: Log In With Your Current Account
Open the eu-haul website in your browser.
Enter your current Bluesky handle (e.g. yourname.bsky.social ).
Enter your password.
If you have two-factor authentication (2FA) enabled, you'll be asked for that code too.
Click Next.
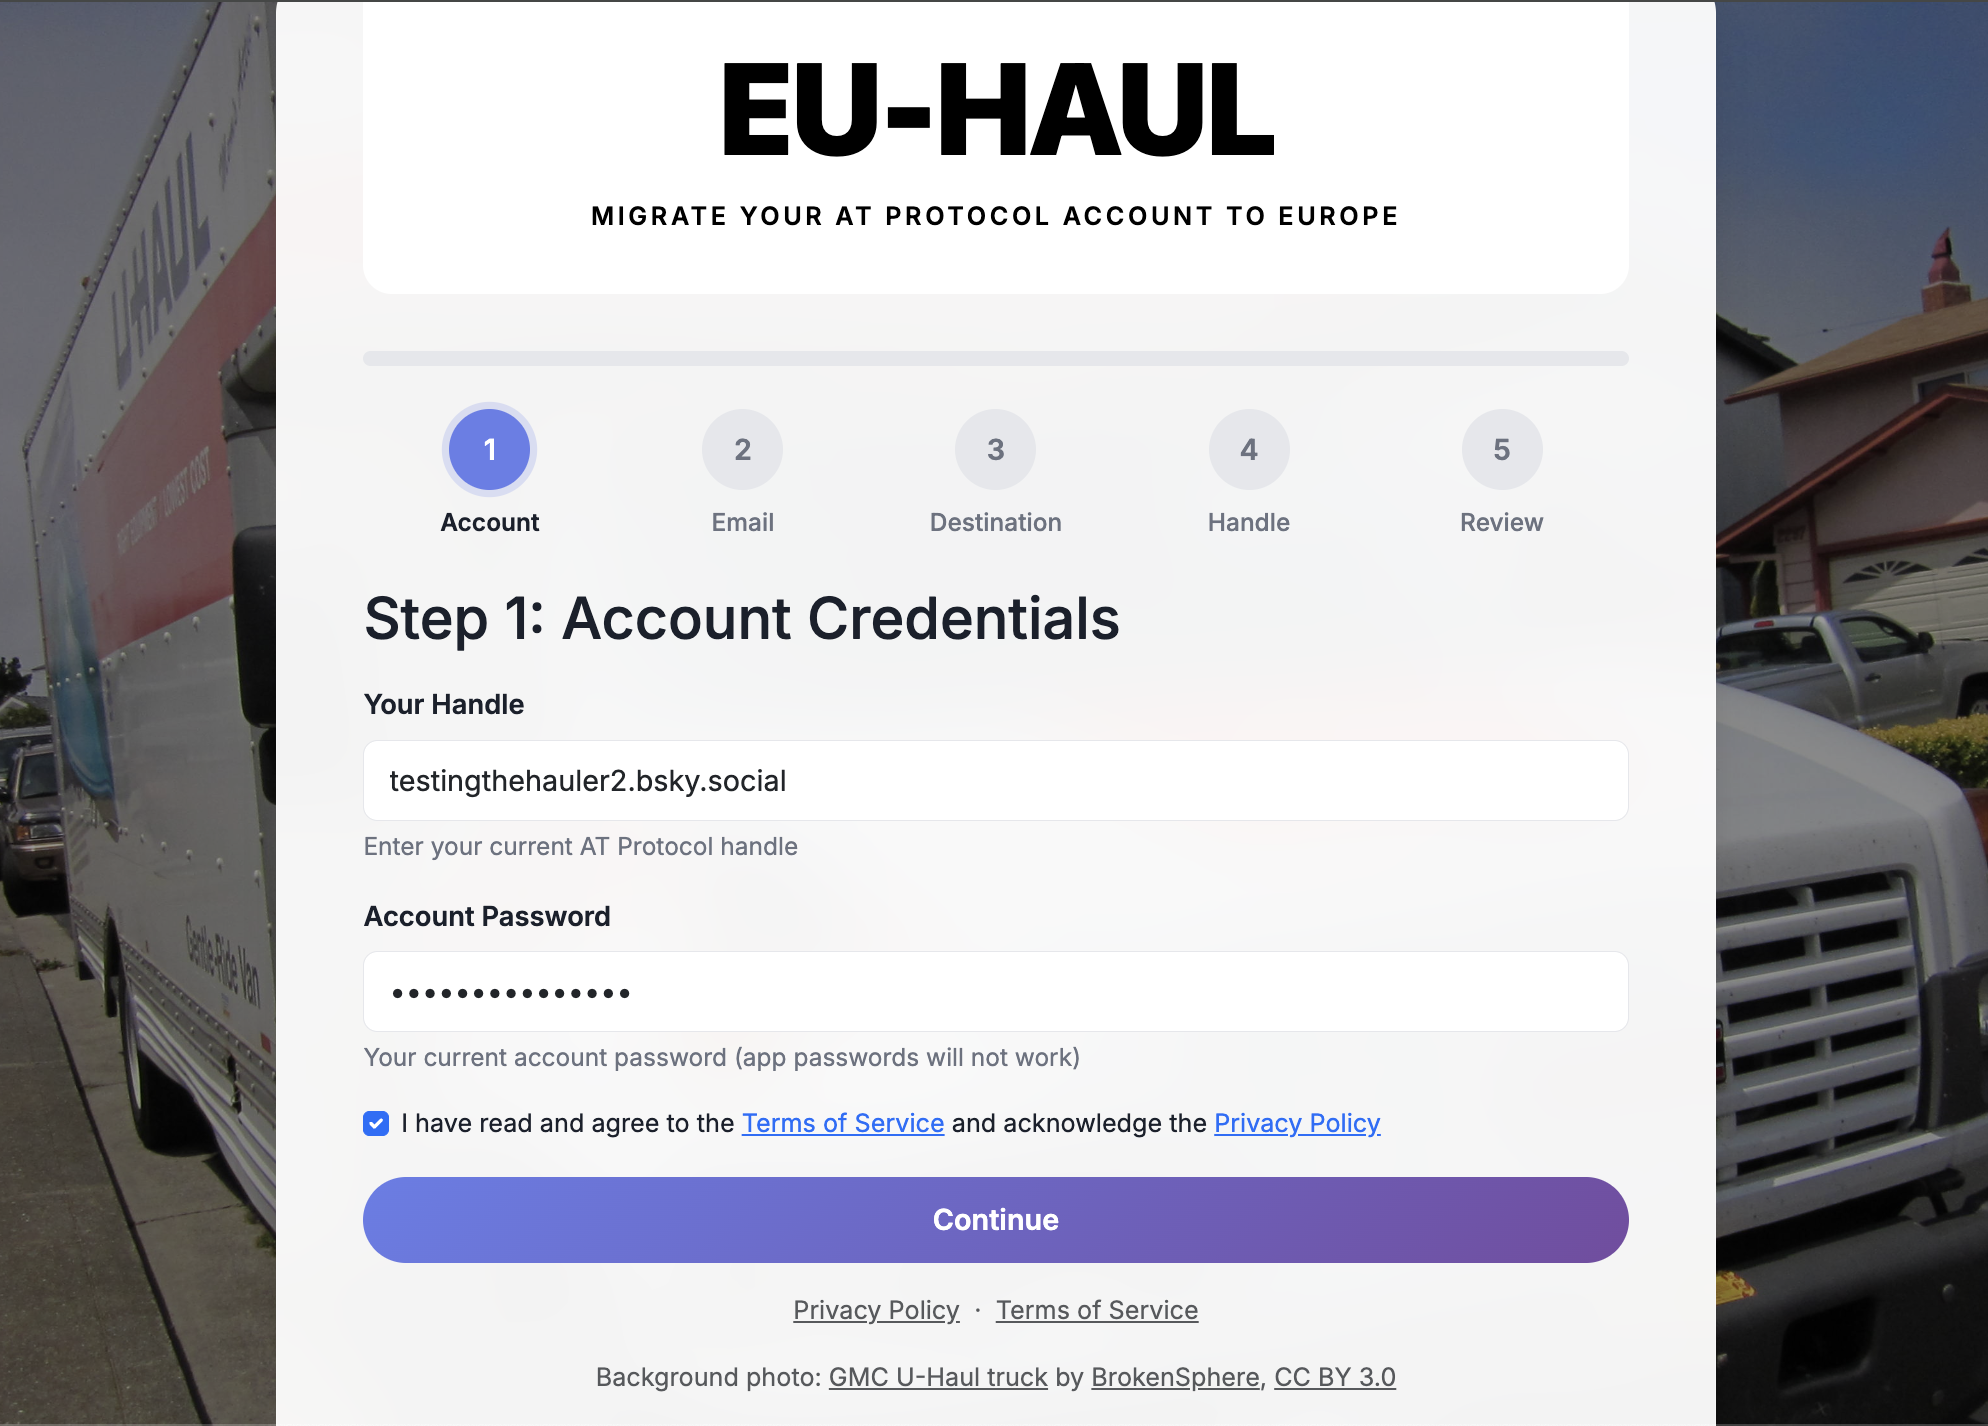
eu-haul will verify your credentials and look up your account. Your password is only
eu-haul will verify your credentials and look up your account. Your password is only used to create a temporary login session - it is encrypted and never stored in plain text.
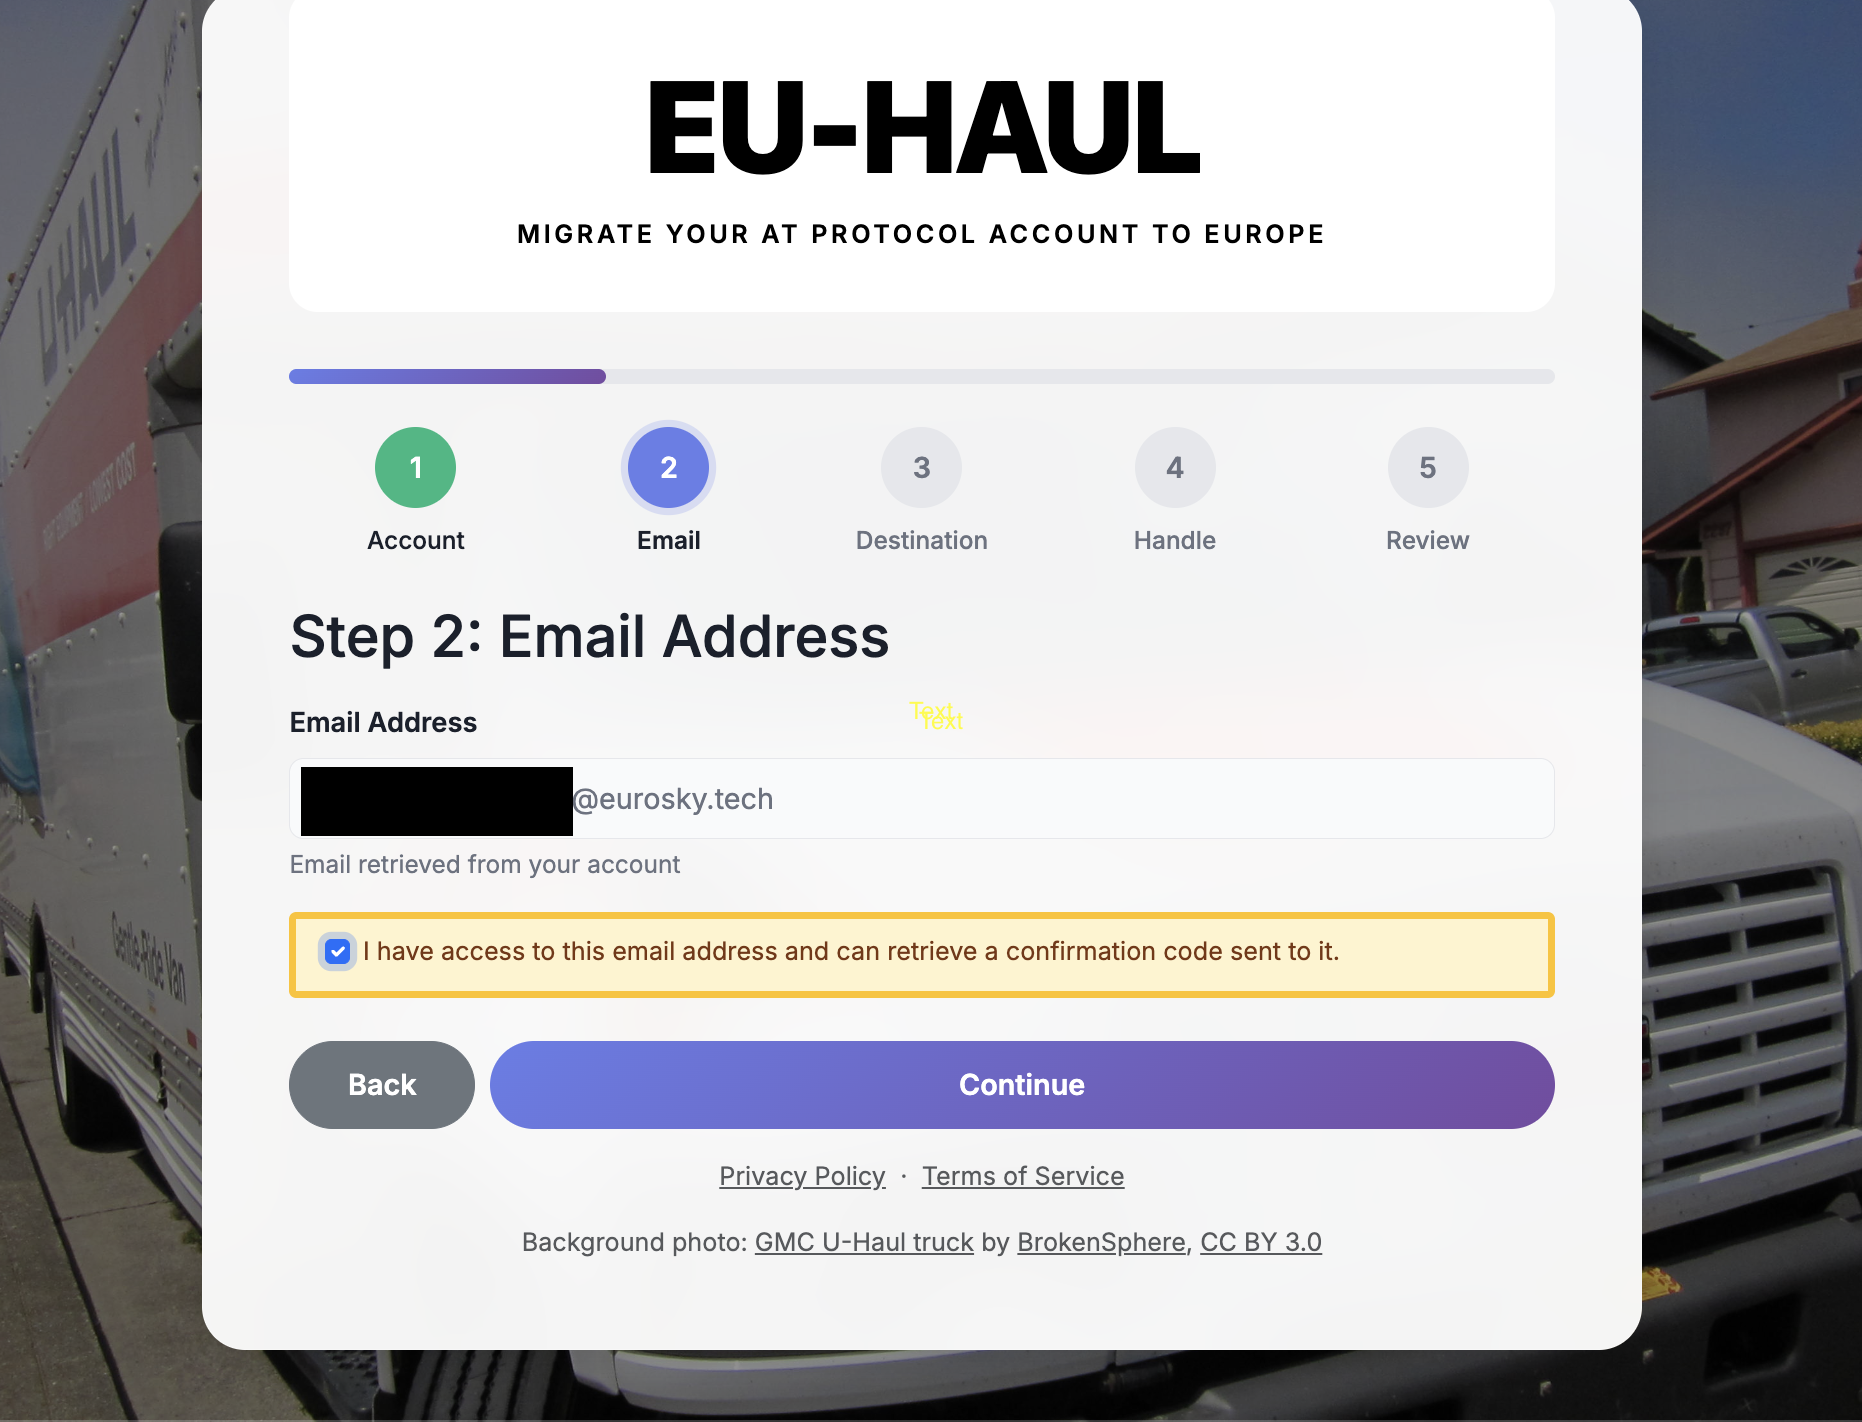
Step 2: Confirm Your Email
Enter the email address linked to your Bluesky account. This may already be filled in for you.
Click Next. You'll use this email later to receive important verification codes.
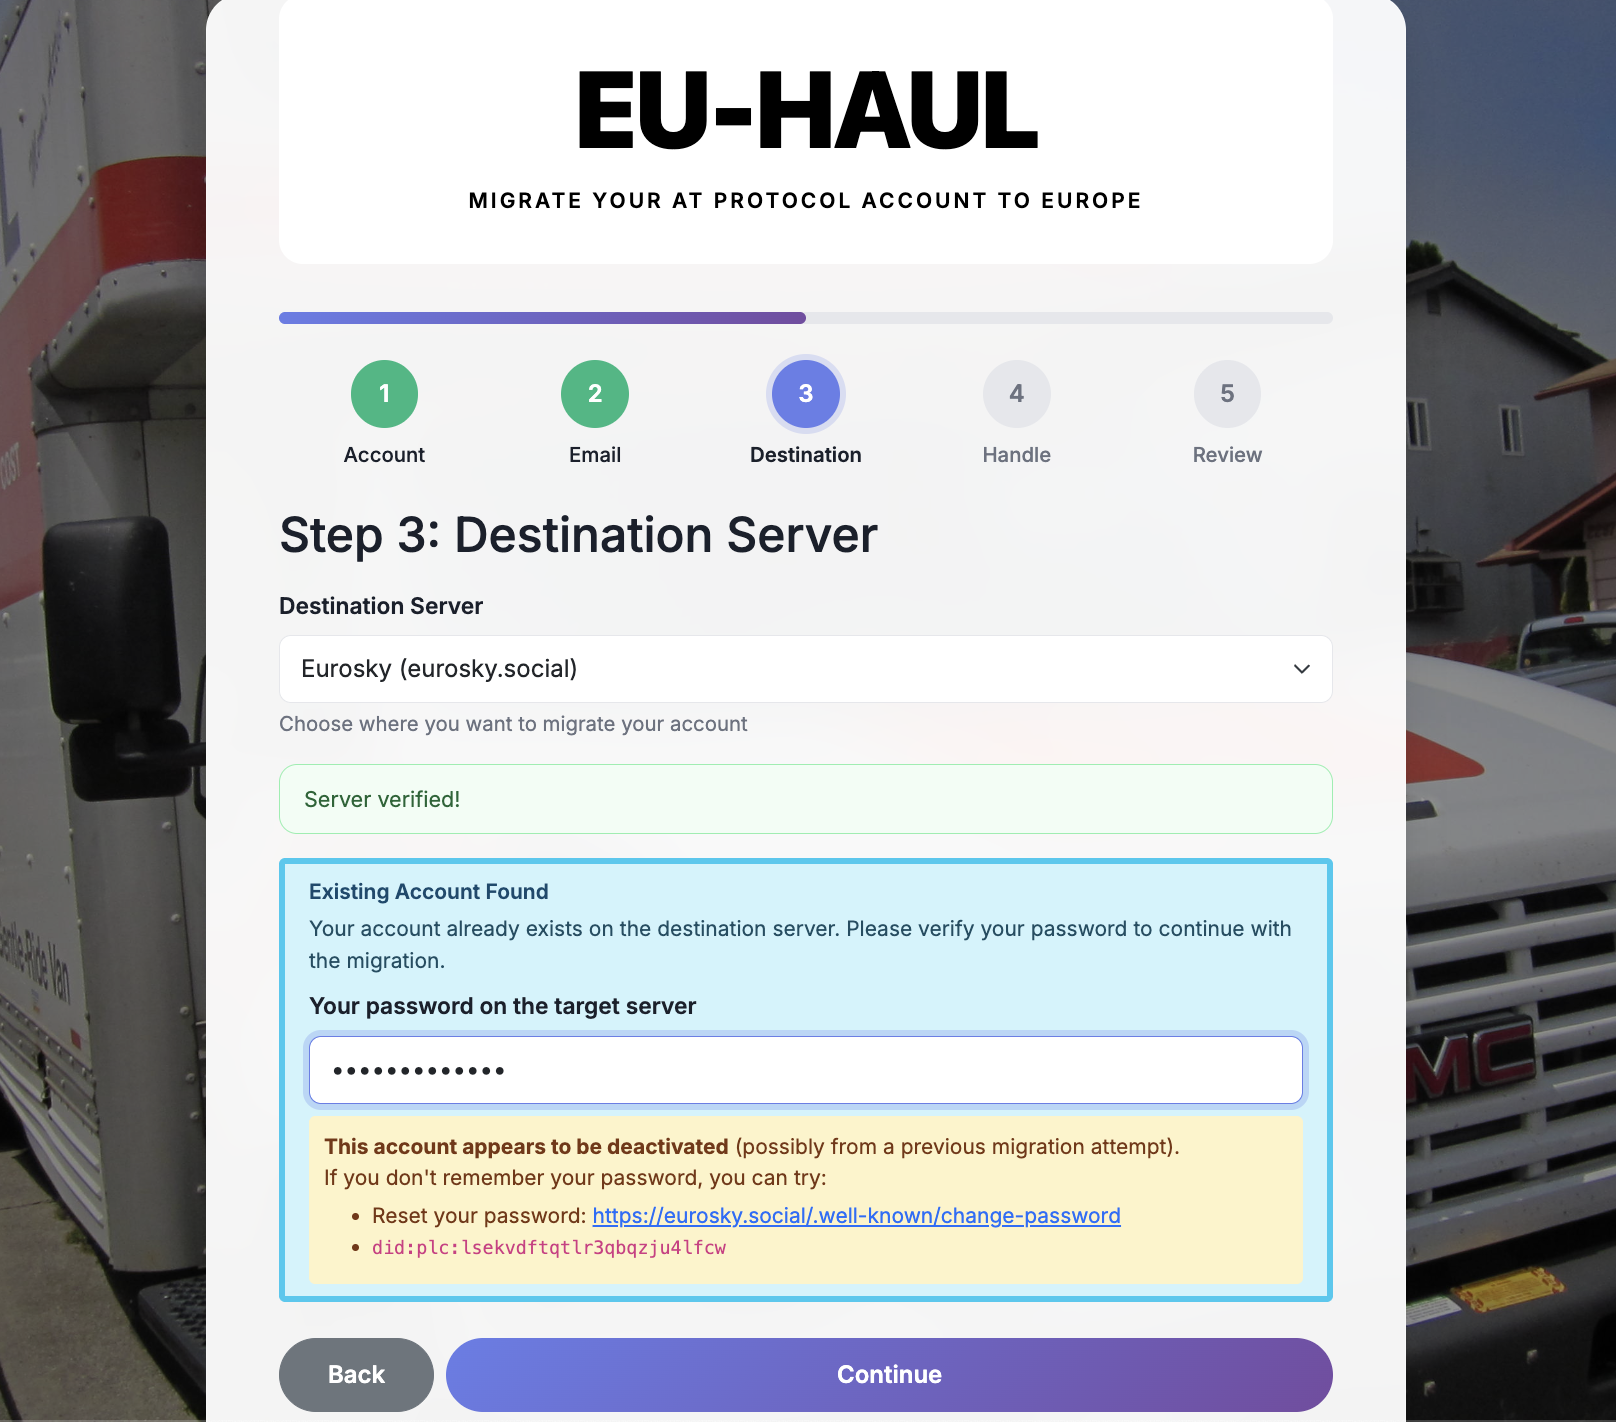
Step 3: Choose Your New Server
Eurosky.social is preselected in the destination server field. Click continue
If you get a message saying “This account appears to be deactivated (possibly from a previous migration attempt)” enter your Bluesky password or, if needed, follow the link to reset your password.
EU-HAUL checks that the server is reachable and ready to accept your account
Step 4: Choose Your New Handle
Here you decide what your username will look like on the new server.
Eurosky-hosted handle: your handle will be yourname.newserver.social
Custom domain: If you own a domain name, you can use it as your handle (e.g. yourname.com ). This requires a DNS record - follow the instructions on screen.
Keep your current handle: In some cases you can keep your existing handle. If this option is available, it will be shown.
Pick the option that works best for you and click Next.

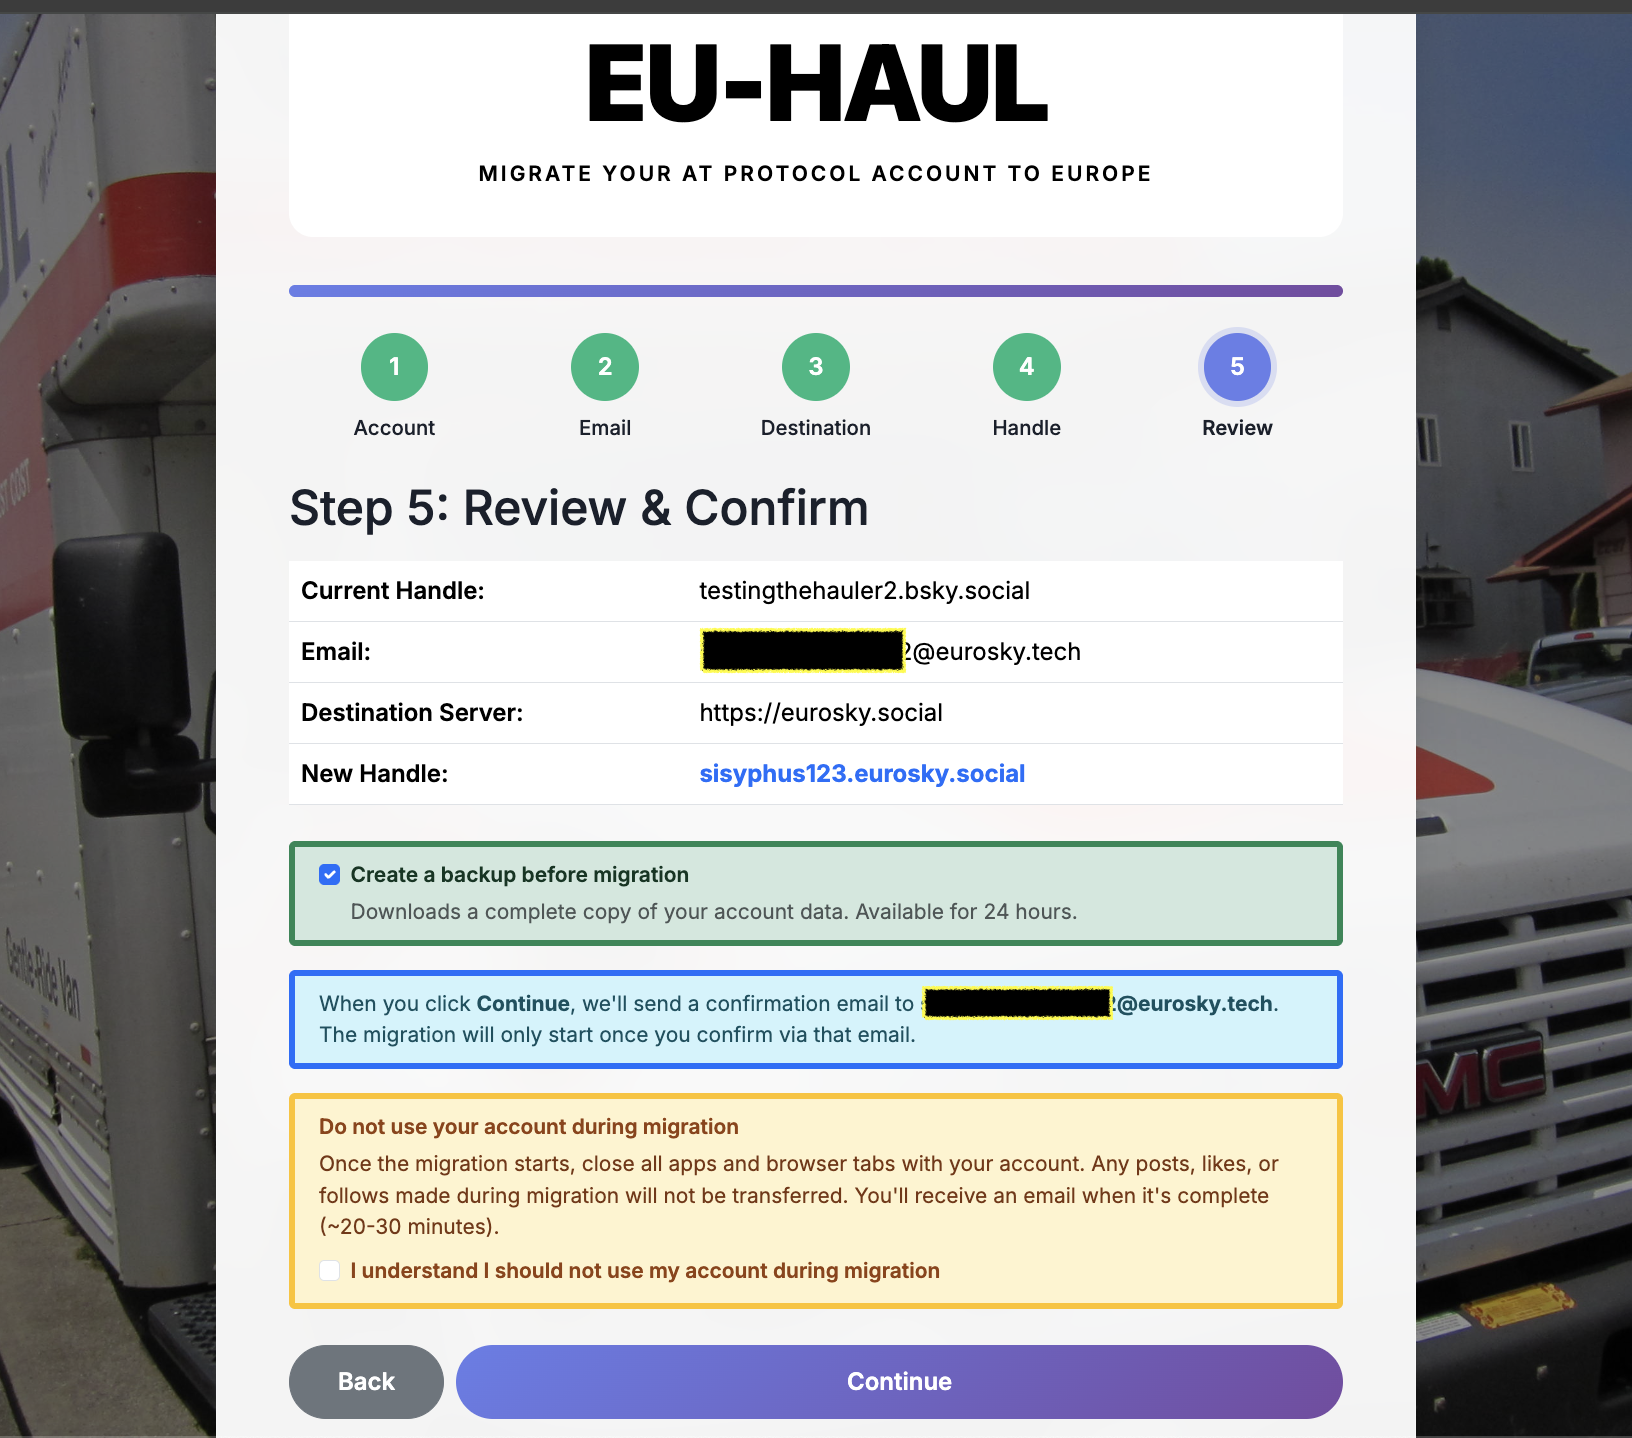
Step 5: Review and Confirm
Review all the information you've entered.
Read and accept the terms.
Click Start Migration.
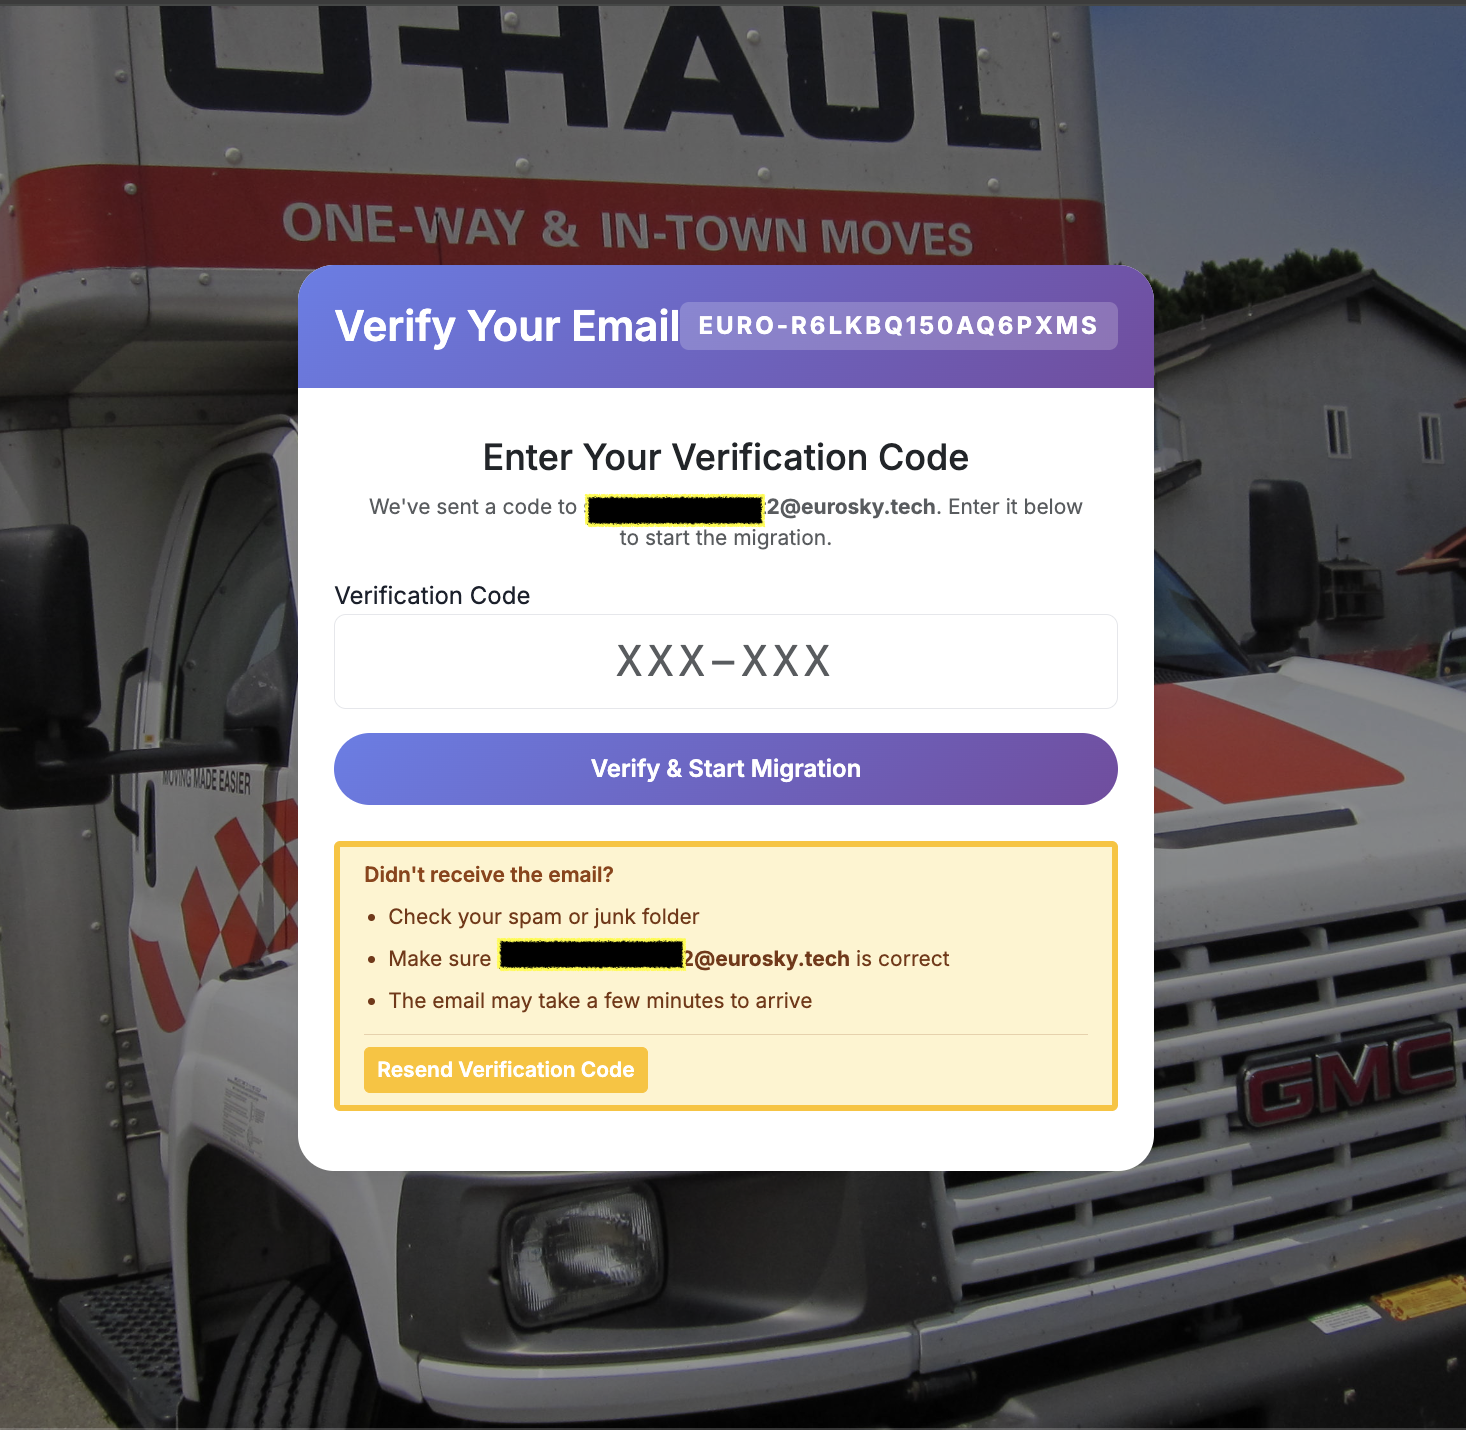
After submitting, you'll be taken to your migration status page. Bookmark this page -- it's the only way to check on your migration.
You'll also receive an email verification code. Enter this code on the status page to confirm your identity before the migration begins.
What Happens During the Migration
Once you've verified your email, the migration starts automatically. You'll see a progress bar that updates every few seconds.
Creating account ——→ Setting up your new home on Eurosky
Importing posts ——→ Copying all your posts, likes, follows, blocks, and lists
Transferring media ——→ Moving your photos, videos, and profile picture
Importing preferences ——→ Copying your Bluesky app settings (muted words, saved feeds, etc.)
This can take a while. If you have lots of photos and videos, the media transfer step may take several minutes or even longer. You don't need to keep the page open - you can come back to your status page any time using the link you bookmarked.
Step 6: The PLC Token Step (Important!)
After all your data has been transferred, the migration will pause and ask you for a PLC token. This is a confirmation code that authorizes the final step of your move.
Check your email for a message with the subject line about confirming your PLC operation.
Copy the token from the email.
Paste it into the field on your migration status page.
This is the final step. Once you submit the PLC token, your account officially moves to the new server. This step updates a global directory that tells the network where your account lives. To go back to Bluesky or any other provider, you will need to start a fresh migration.
Click Submit to finalize the move.
Didn't get the email? Check your spam folder. If it's not there, click "Request new PLC token" on the status page to have it sent again.
After the Migration
Once the migration is complete, you'll see a success message. A few important things:
Save Your Recovery Key
After the migration completes, you may be shown a recovery key (also called a rotation key). This is like a master key for your account identity.
Copy it and store it somewhere safe
(password manager, printed copy, etc.). This key lets you regain control of your account identity if something ever goes wrong.
You won't be able to retrieve it later - save it now.
Log In to Your New Server
Open your Bluesky app/website (further details below) or other client you’re using.
Log in with your new handle and the password you use for the new server. Everything should be there: your posts, your followers, your settings.
Clean Up
Your old account will be automatically deactivated. You don't need to do anything.
The migration status page will show a Delete Migration Record button. Click this when you're ready to remove all migration data from the eu-haul server. Migration records are automatically deleted after a set period for your privacy
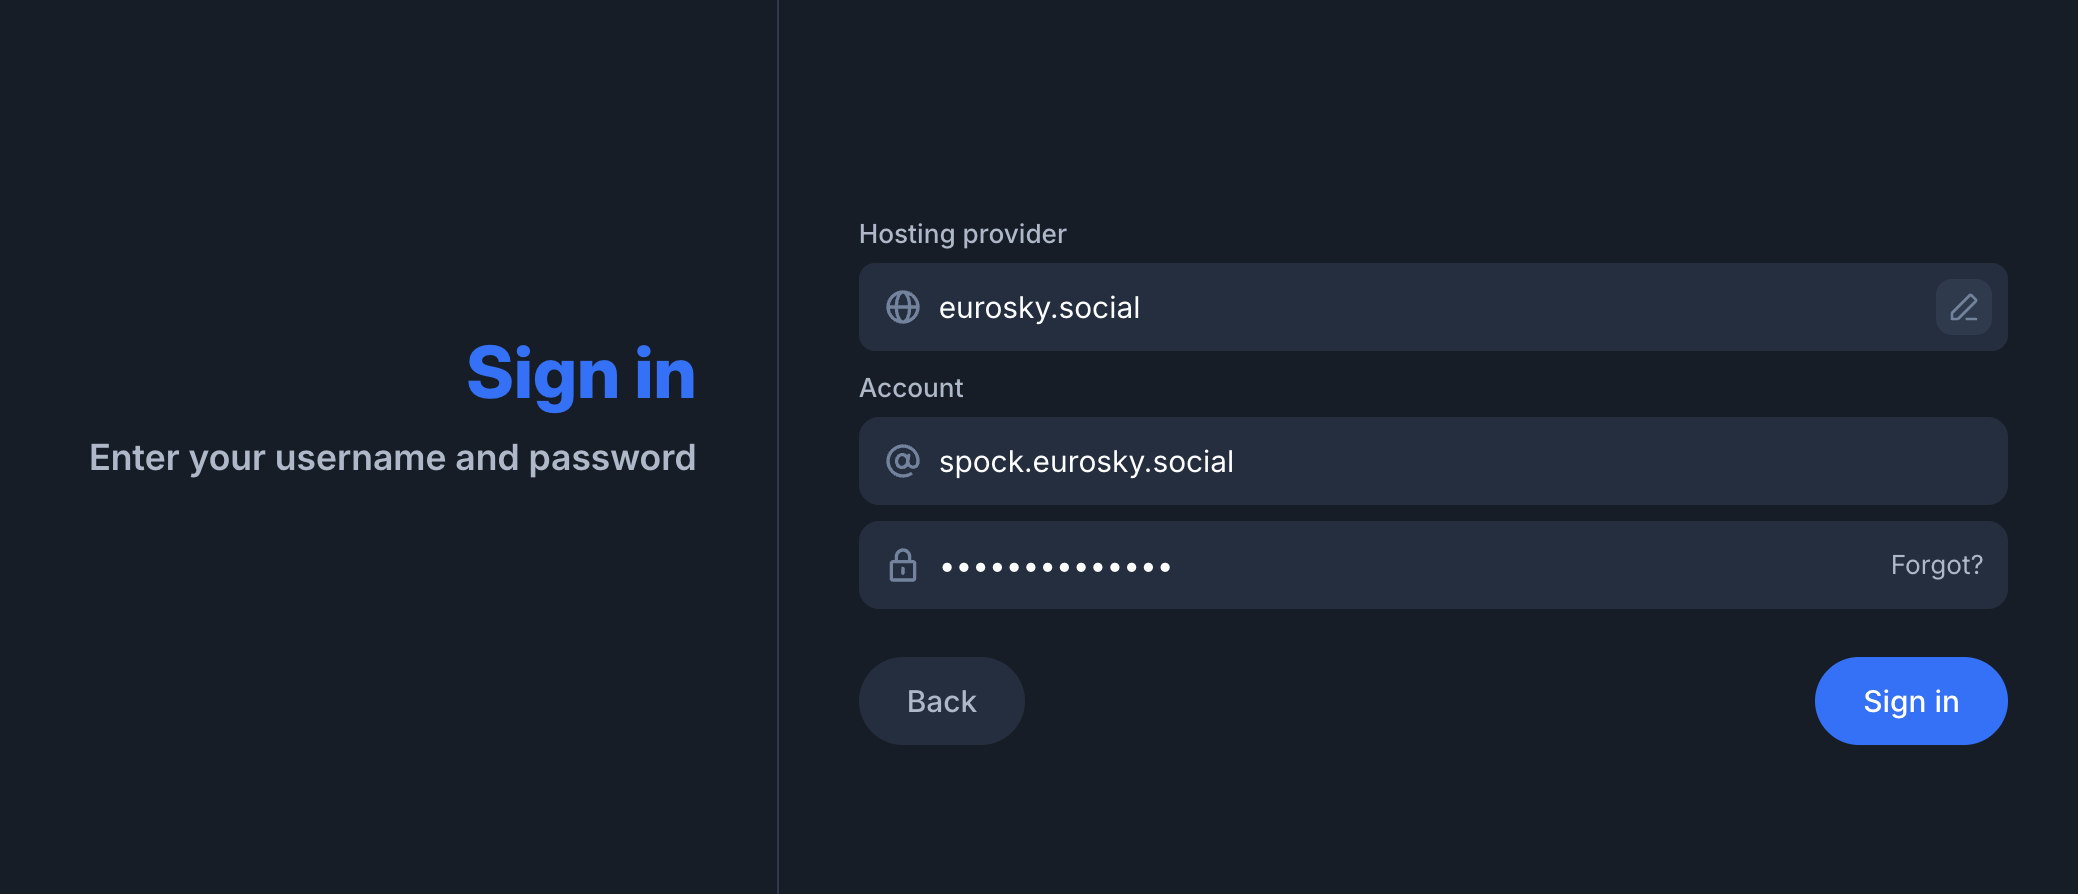
Logging in to Bluesky with your new Eurosky account
If you find this option, click Cancel, do not click reactivate my account
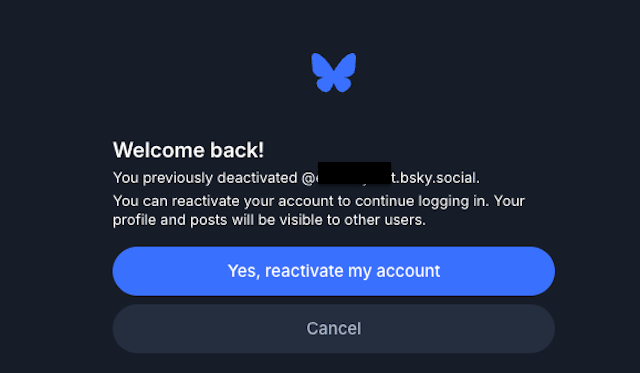
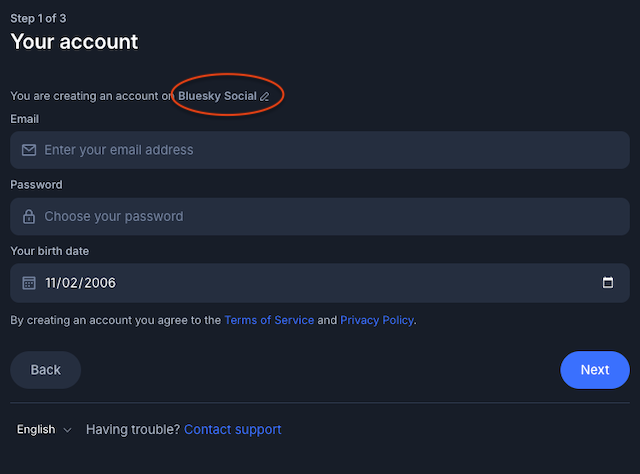
You will see this. Click sign in. On the next page click your account (it will show as logged out)
9 On the next page, click on the edit button in the ‘Hosting provider’ field.
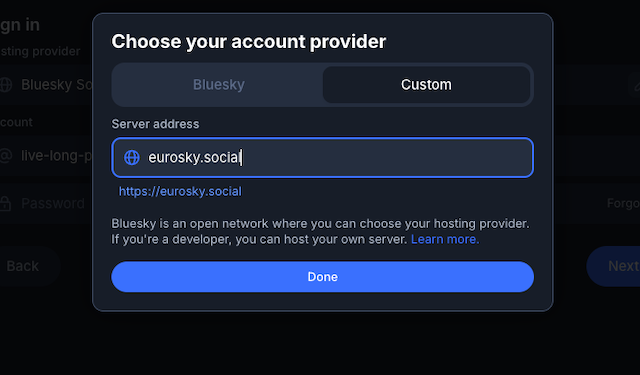
A popup will appear to select your account provider, select ‘custom’ and type eurosky.social and press done.
Type your eurosky account name and password, then click next! You’re done! Remember that when you need to sign in to Bluesky again, you need to select the custom provider option.